How to create layouts and pages
Next.js uses file-system based routing, meaning you can use folders and files to define routes. This page will guide you through how to create layouts and pages, and link between them.
Creating a page
A page is UI that is rendered on a specific route. To create a page, add a page file inside the app directory and default export a React component. For example, to create an index page (/):

export default function Page() {
  return <h1>Hello Next.js!</h1>
}
Creating a layout
A layout is UI that is shared between multiple pages. On navigation, layouts preserve state, remain interactive, and do not rerender.
You can define a layout by default exporting a React component from a layout file. The component should accept a children prop which can be a page or another layout.
For example, to create a layout that accepts your index page as child, add a layout file inside the app directory:

export default function DashboardLayout({
  children,
}: {
  children: React.ReactNode
}) {
  return (
    <html lang="en">
      <body>
        {/* Layout UI */}
        {/* Place children where you want to render a page or nested layout */}
        <main>{children}</main>
      </body>
    </html>
  )
}
The layout above is called a root layout because it's defined at the root of the app directory. The root layout is required and must contain html and body tags.
Creating a nested route
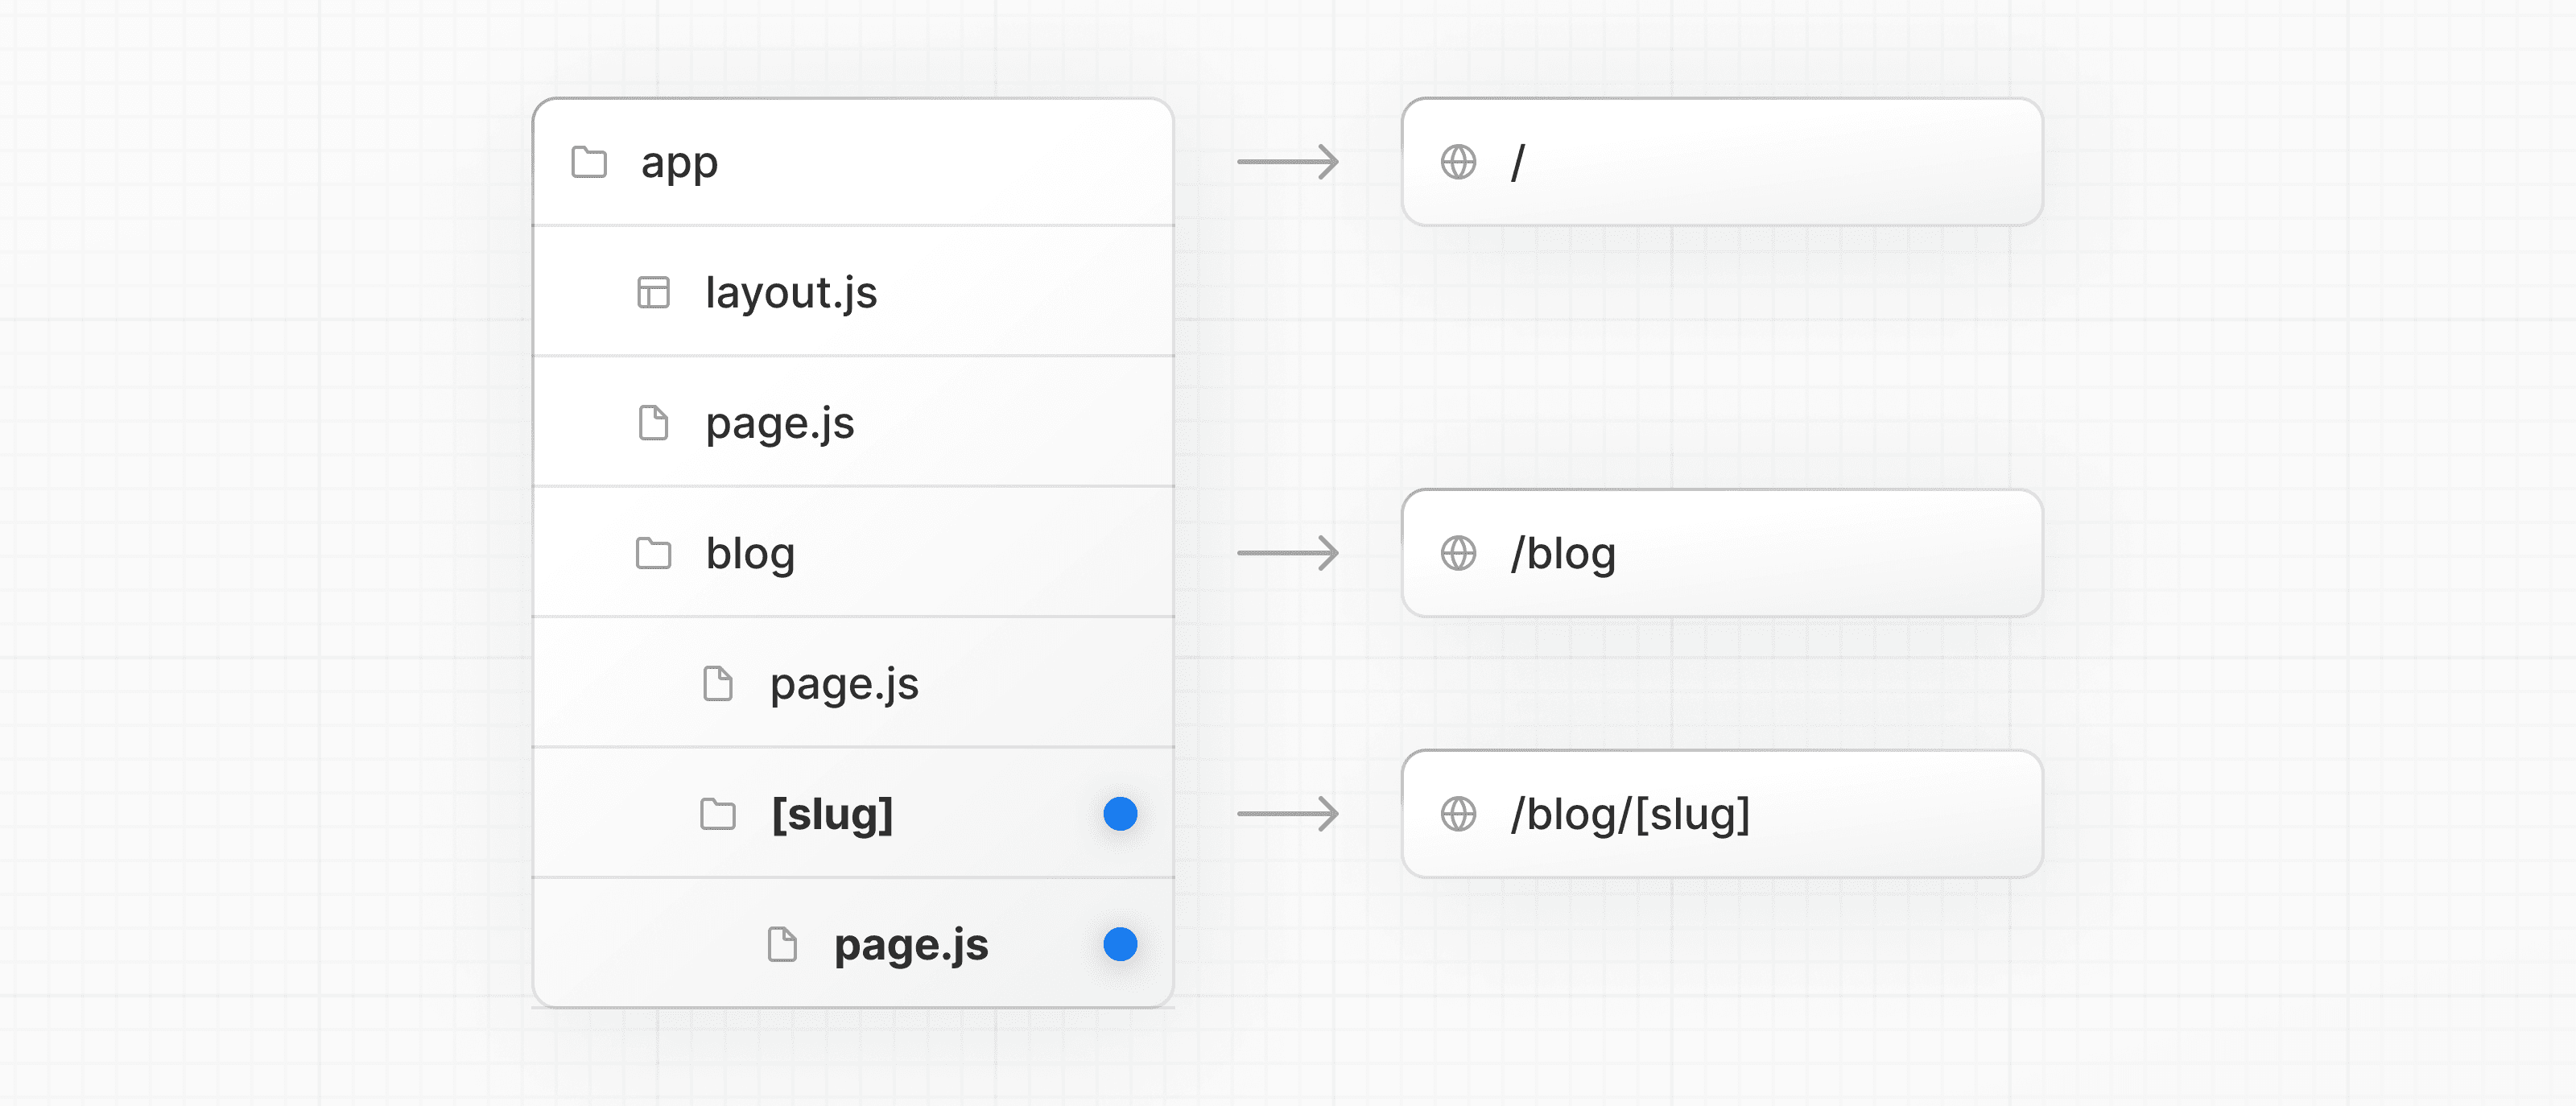
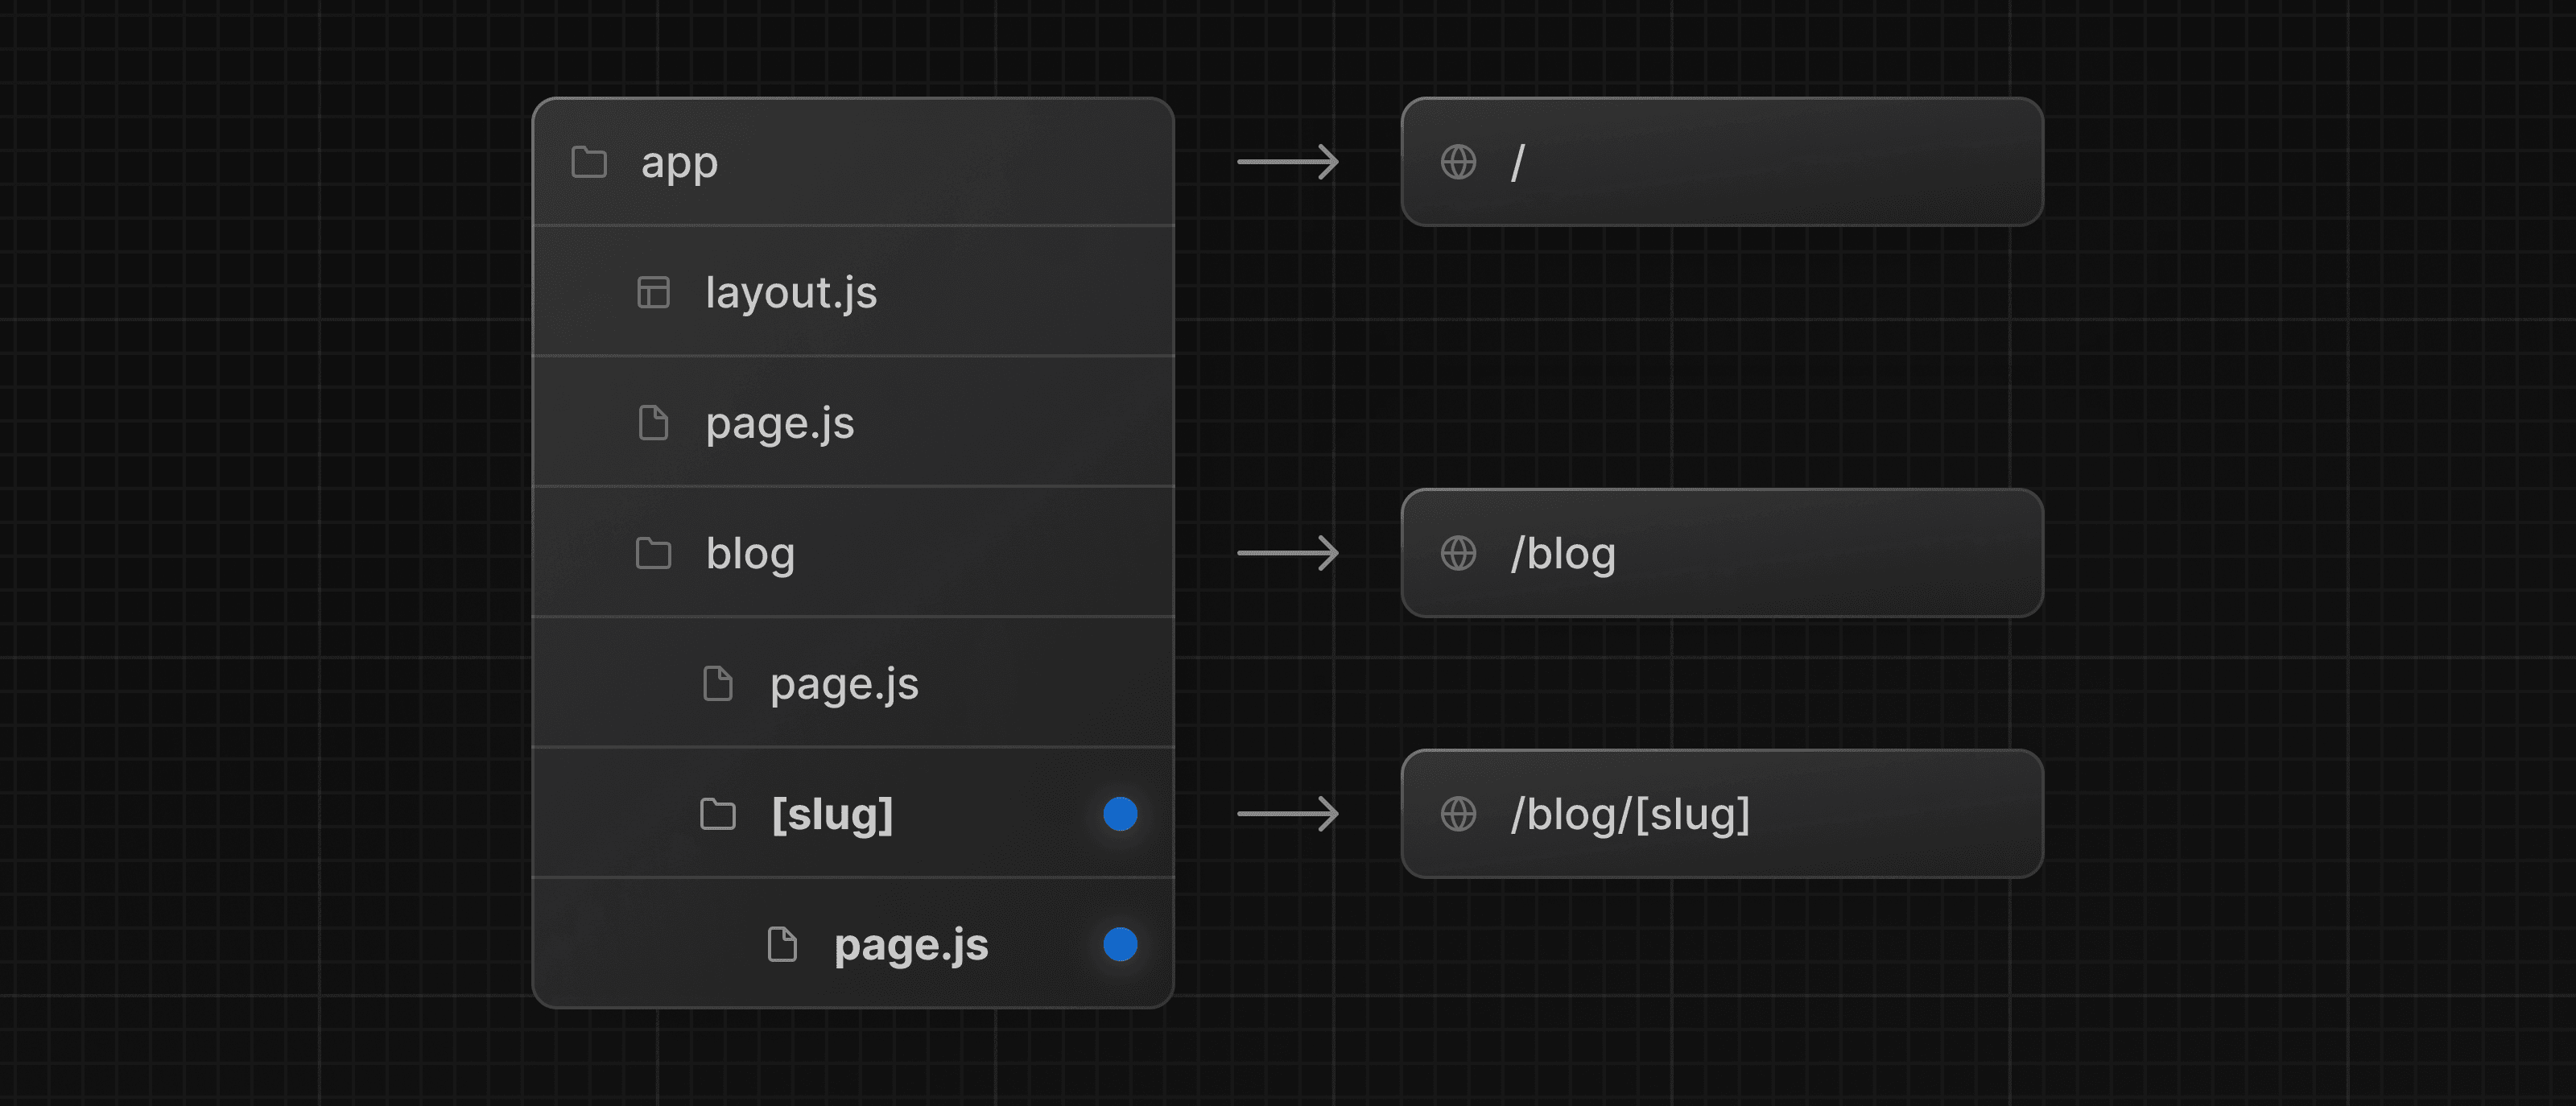
A nested route is a route composed of multiple URL segments. For example, the /blog/[slug] route is composed of three segments:
/(Root Segment)blog(Segment)[slug](Leaf Segment)
In Next.js:
- Folders are used to define the route segments that map to URL segments.
- Files (like
pageandlayout) are used to create UI that is shown for a segment.
To create nested routes, you can nest folders inside each other. For example, to add a route for /blog, create a folder called blog in the app directory. Then, to make /blog publicly accessible, add a page.tsx file:

// Dummy imports
import { getPosts } from '@/lib/posts'
import { Post } from '@/ui/post'

export default async function Page() {
  const posts = await getPosts()

  return (
    <ul>
      {posts.map((post) => (
        <Post key={post.id} post={post} />
      ))}
    </ul>
  )
}
You can continue nesting folders to create nested routes. For example, to create a route for a specific blog post, create a new [slug] folder inside blog and add a page file:

function generateStaticParams() {}

export default function Page() {
  return <h1>Hello, Blog Post Page!</h1>
}
Wrapping a folder name in square brackets (e.g. [slug]) creates a dynamic route segment which is used to generate multiple pages from data. e.g. blog posts, product pages, etc.
Nesting layouts
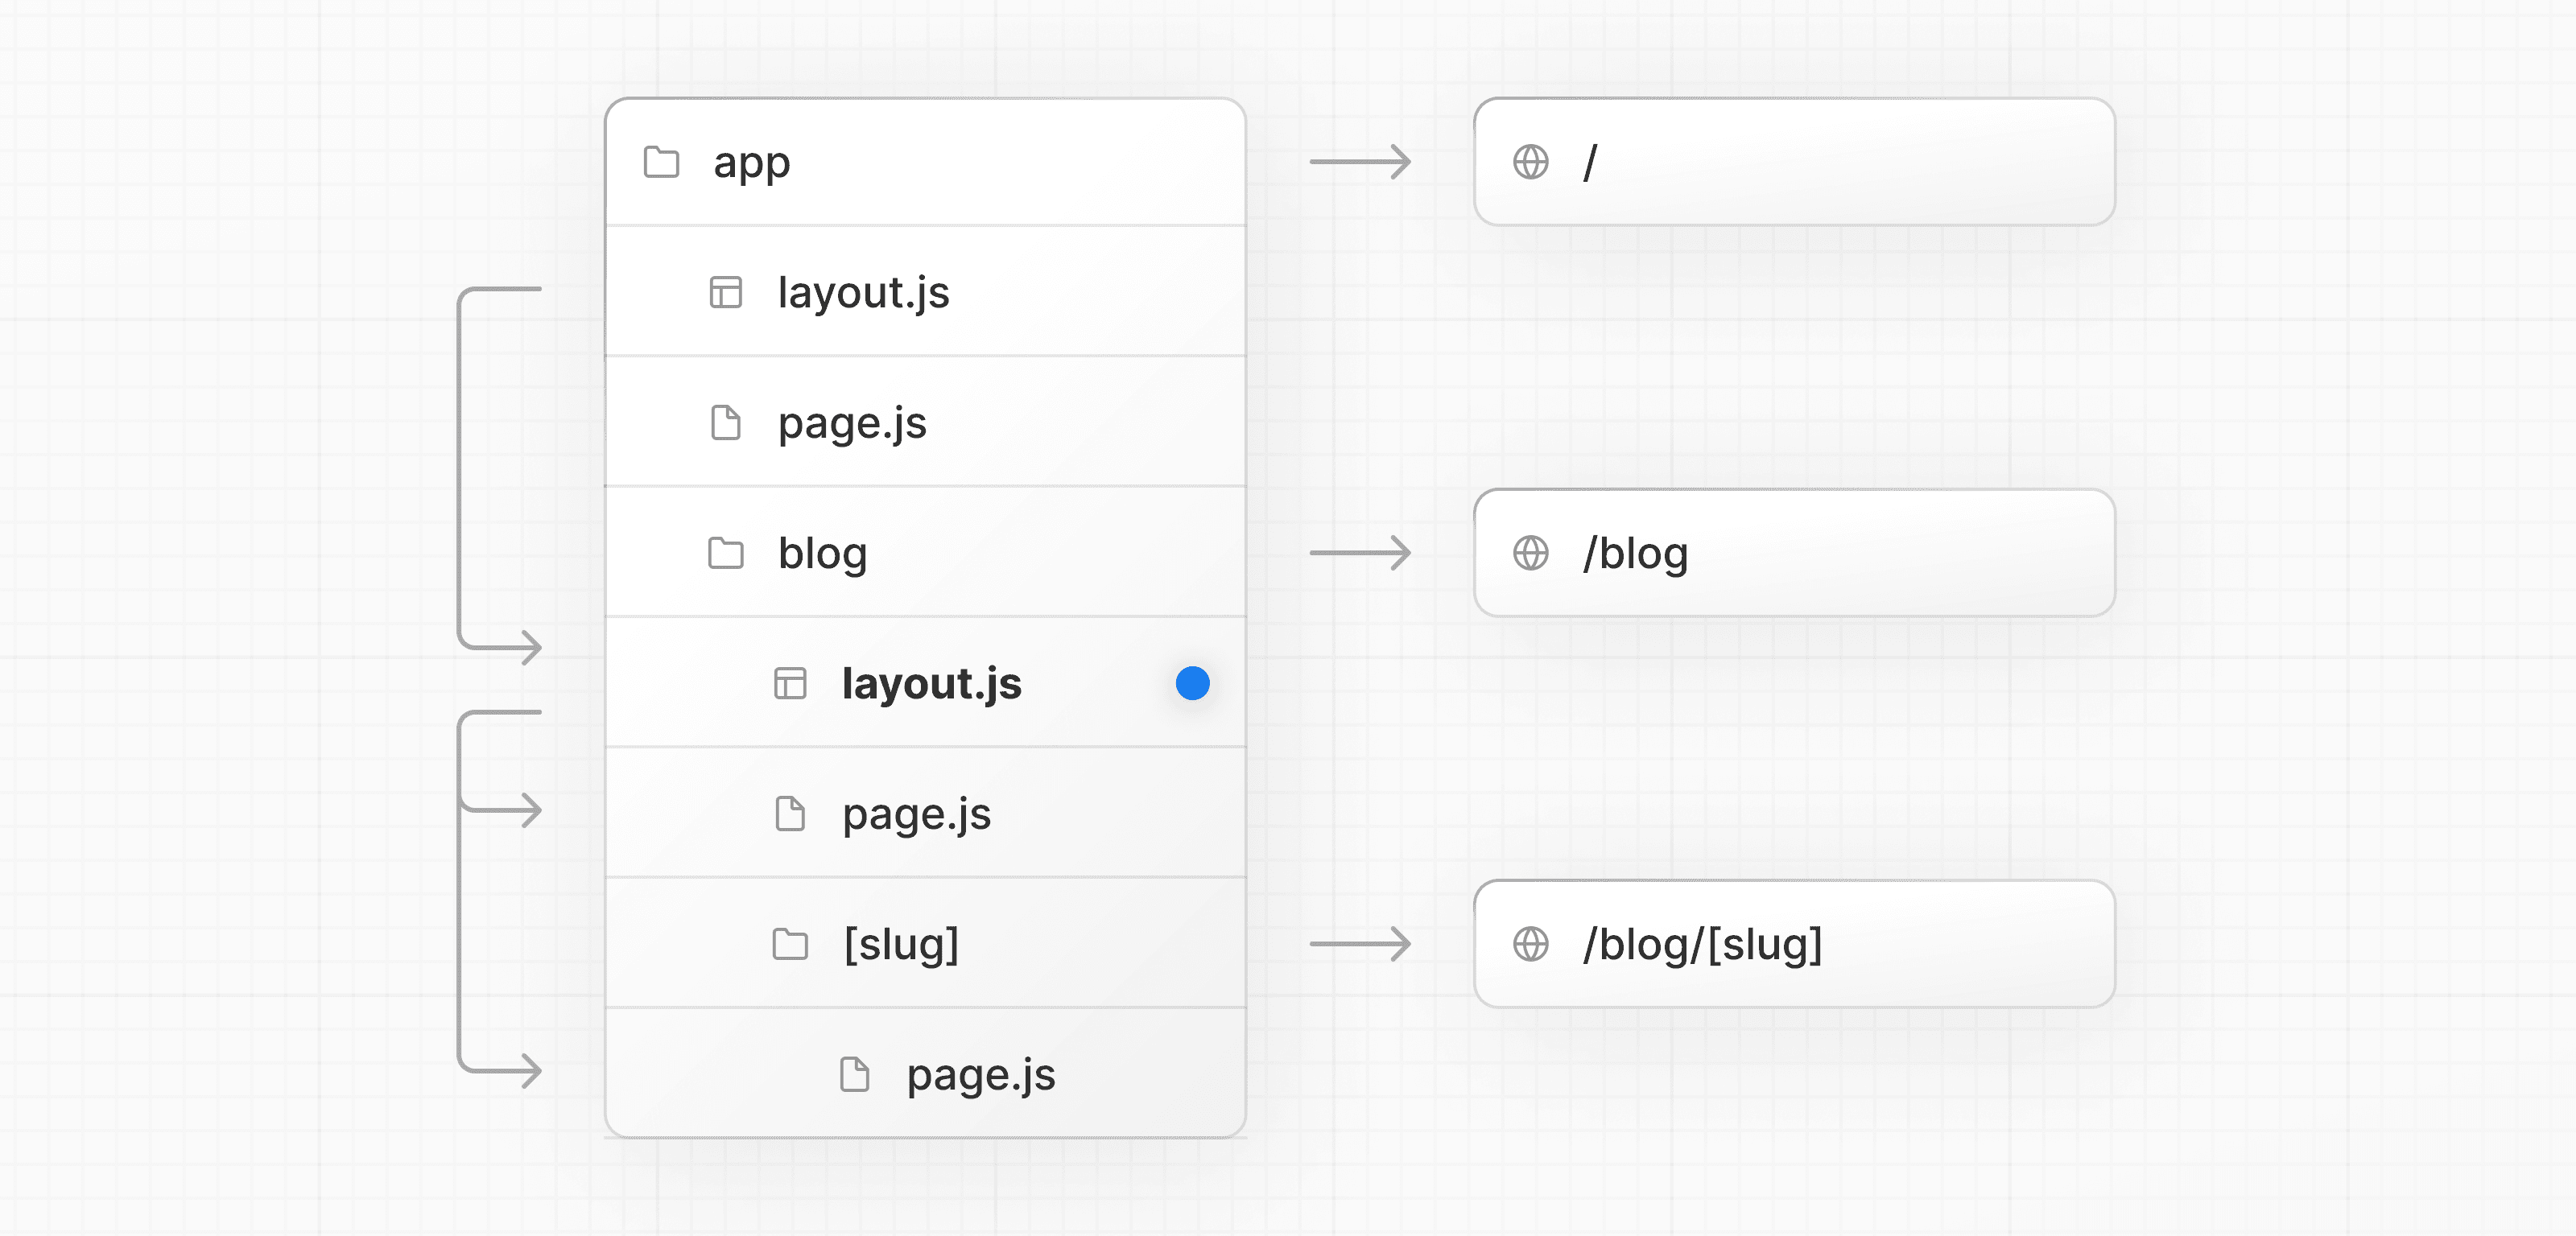
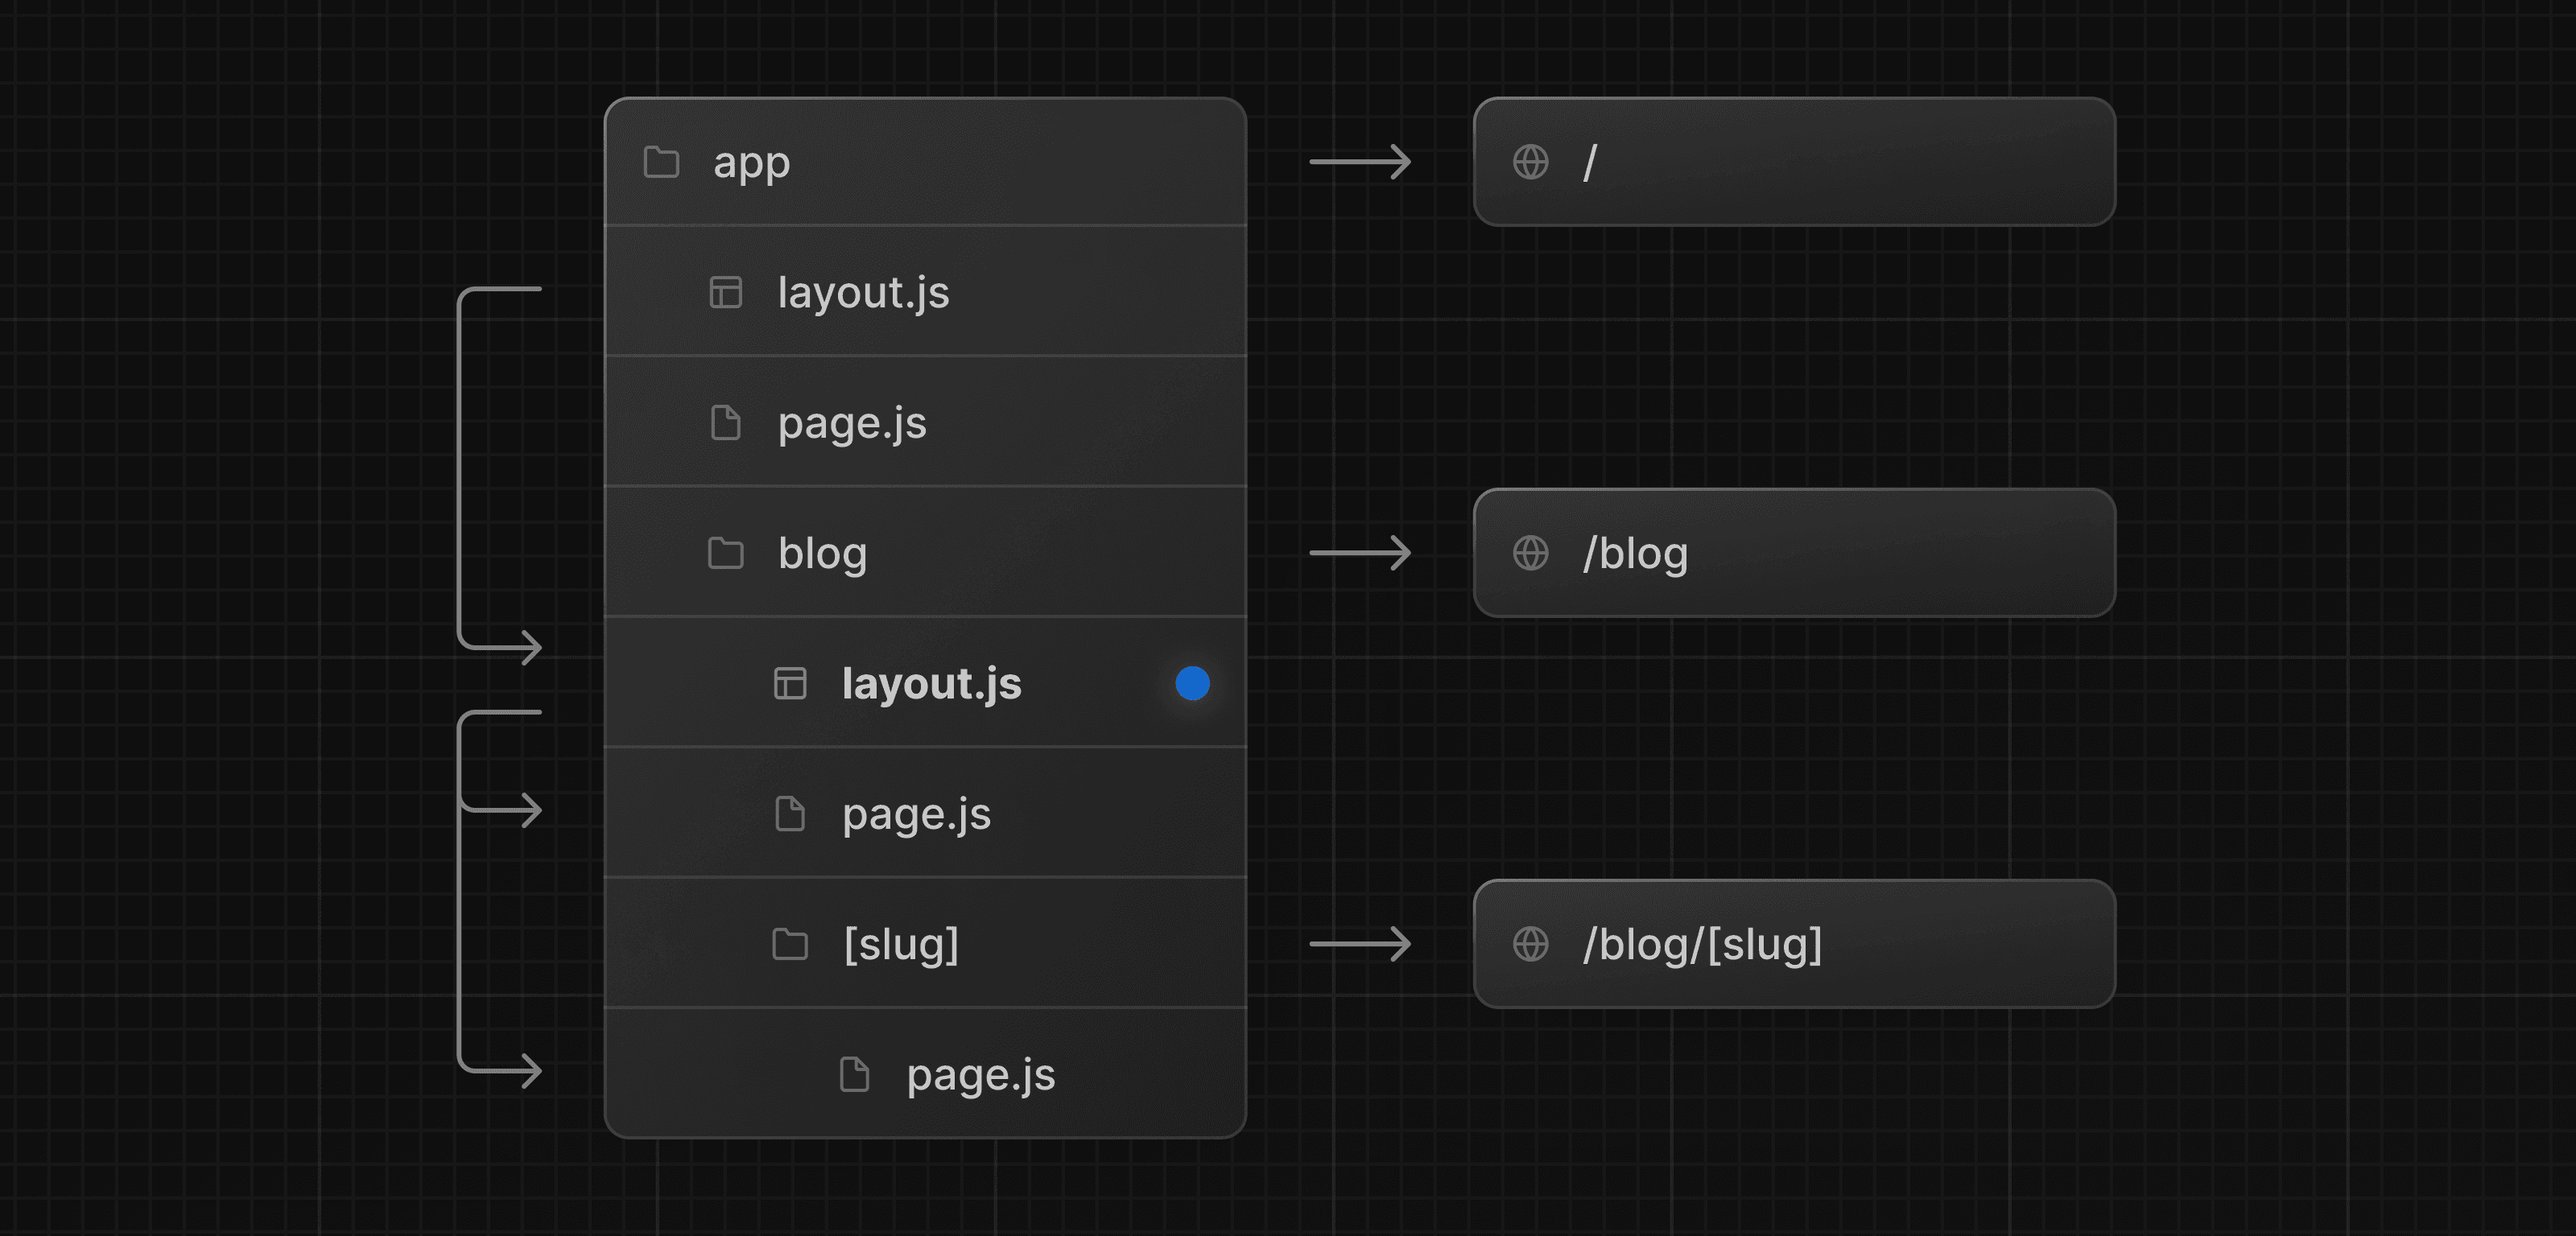
By default, layouts in the folder hierarchy are also nested, which means they wrap child layouts via their children prop. You can nest layouts by adding layout inside specific route segments (folders).
For example, to create a layout for the /blog route, add a new layout file inside the blog folder.

export default function BlogLayout({
  children,
}: {
  children: React.ReactNode
}) {
  return <section>{children}</section>
}
If you were to combine the two layouts above, the root layout (app/layout.js) would wrap the blog layout (app/blog/layout.js), which would wrap the blog (app/blog/page.js) and blog post page (app/blog/[slug]/page.js).
Linking between pages
You can use the <Link> component to navigate between routes. <Link> is a built-in Next.js component that extends the HTML <a> tag to provide prefetching and client-side navigation.
For example, to generate a list of blog posts, import <Link> from next/link and pass a href prop to the component:
import Link from 'next/link'

export default async function Post({ post }) {
  const posts = await getPosts()

  return (
    <ul>
      {posts.map((post) => (
        <li key={post.slug}>
          <Link href={`/blog/${post.slug}`}>{post.title}</Link>
        </li>
      ))}
    </ul>
  )
}
<Link> is the primary and recommended way to navigate between routes in your Next.js application. However, you can also use the useRouter hook for more advanced navigation.
API Reference
Was this helpful?


